- - -
Introduction
All 'S' and 'T' series 500-Sheet Trays prior to the T640 have a pivoting lever near the front in the left side drawer slide's way. The lever tensions the outfeed pinch roller when the drawer is closed. Opening the drawer releases tension on the pinch roller to facilitate clearing a paper jam. There's a rectangular protrusion on the top surface of the drawer's left side slide that actuates the lever. Here's a view of the lever.

And here's a view of the protrusion on the drawer that actuates it.
 The actuation interface was poorly designed. With long use, the end of the lever wears until it tends to wedge in place on top of the actuator protrusion and jam the drawer closed. The user yanks hard on the drawer to open it and the lever breaks. The tray is rendered inoperative because the outfeed pinch roller is no longer tensioned by a closed drawer -- the tray can no longer feed out paper reliably.
On a tray where the lever is still intact, there's a small modification that can be done that will make the lever last forever. We do this to all the trays that come through here.
- - -
The Modification
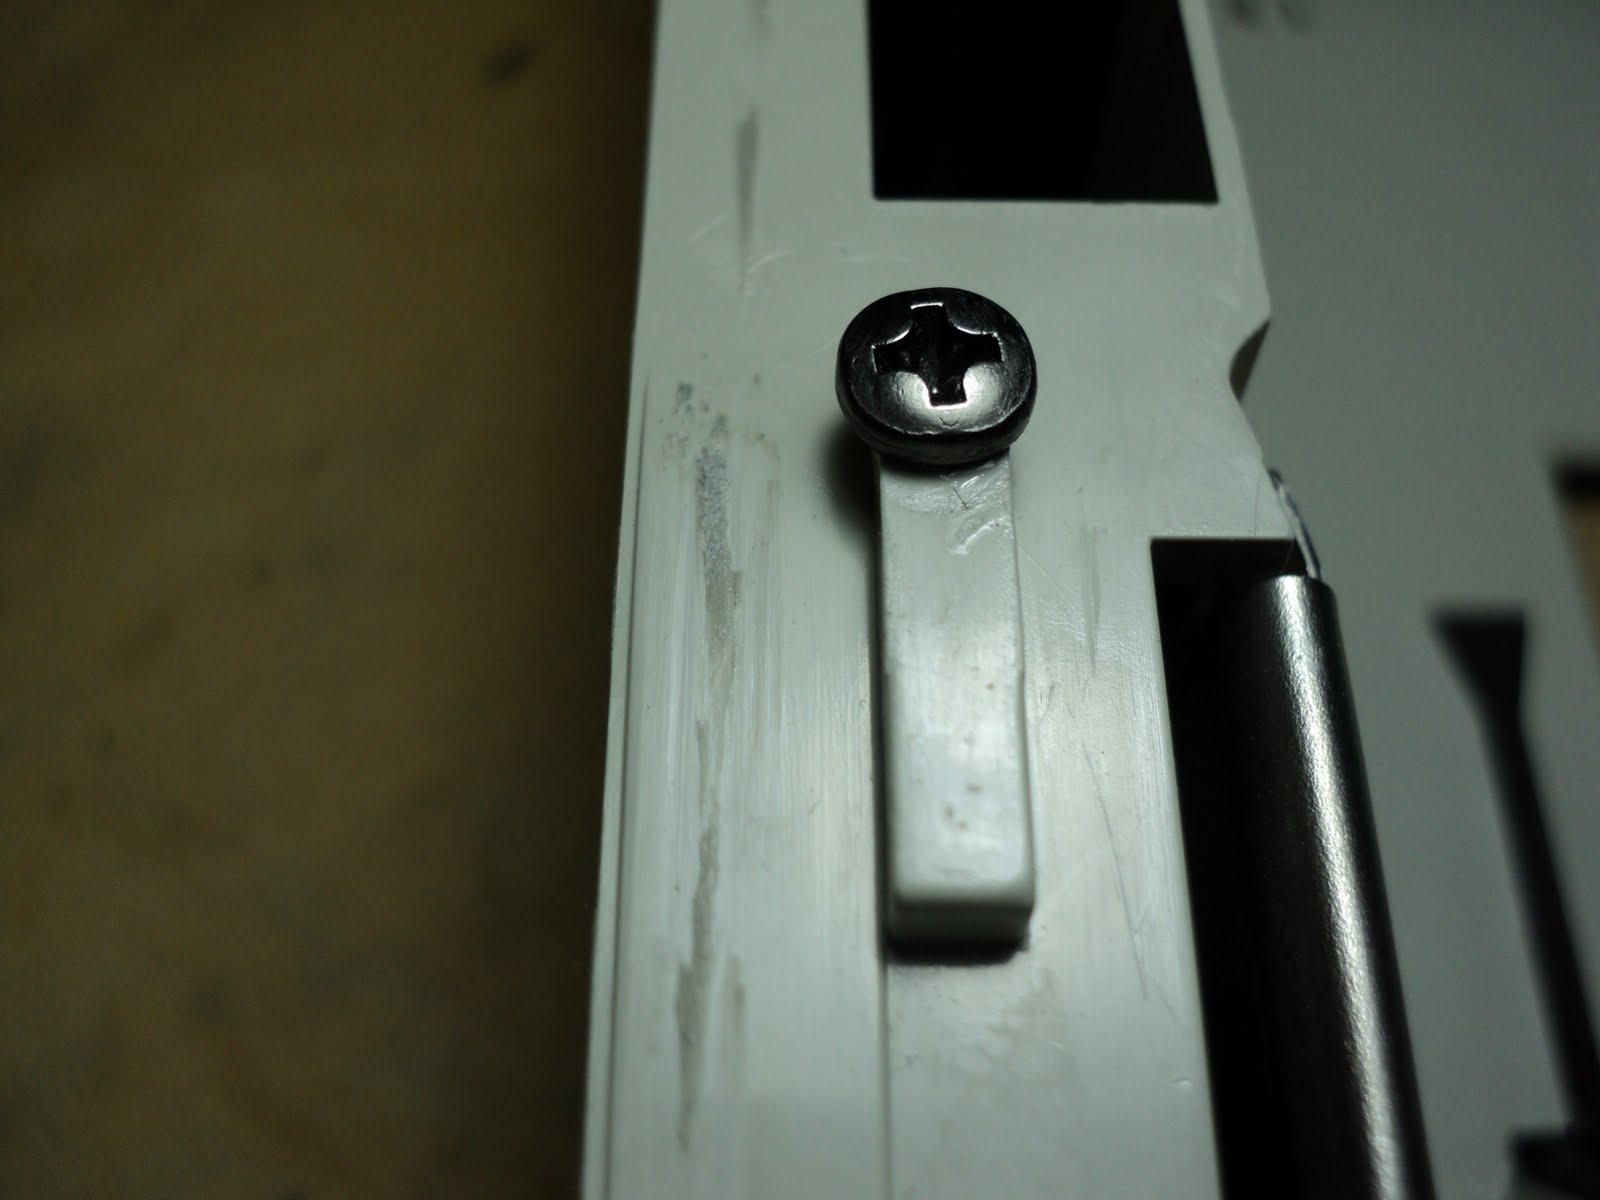
At a point on the rectangular actuating protrusion 1/8" forward of the protrusion's rear edge, install an M3x8mm pan head threading screw. (A screw from a broken T630 MP Feeder door/platform is ideal.) Drill a 5/64" diameter pilot hole. Apply CA adhesive to the hole and the screw and run the screw in fully and firmly. Wipe away any excess glue. Here's a photo of the protrusion with a screw installed.
Insert the drawer fully into the chassis and remove it. Flip the chassis upside down and you'll see where the head of the screw you just installed scraped the plastic above it. Guided by the scrape, file a groove sufficient to clear the screwhead and permit the drawer to operate smoothly. (Optra S trays have enough clearance that this step isn't necessary.) A coarse, 1/4" diameter round file is ideal. Here's how it looks after filing.
 What the screw head does is it provides a lever actuation surface that deflects the lever without ever getting underneath its end. A drawer with this modification done to it will never wedge under a lever and break it.
One last tip -- wipe the drawer slides with WD-40 and you'll have a drawer with a much nicer action to it.
# # #
# # #
No comments:
Post a Comment